So last time I posted I gave a quick update on the book. This time is no different, I just wanted to share that I finished
drafting the chapter on building less and JavaScript assets as part of the deployment process. What follows is the
chapter, hope you find it useful.
By the way you can read the chapter here.
Here’s also a list of chapters you can find as blog posts on the site:
Building our assets
Now that we have a pipeline up and running it’s time to turn our attention to dealing with building our code and assets and figure out how are our app will consume these. We do not want to check in our generated assets, however Heroku deploys using a git mechanism.
Let’s start by creating some tasks to generate our css, then concatenate and ulgyfy our JS and we’ll finish by deploying these assets to Heroku as part of a successful build. We’ll also add some tasks to run these tasks on our local machine and have these re-generated when we save changes to the file.
git checkout -c generate-assets
Compile our less to css
Let’s tackle with our CSS files. The first thing we want to do is add the destination folder for our css content to the .gitignore list:
node_modules
.idea
bower_components
phantomjsdriver.log
app/css/
Under our source folder let’s create a less folder and create a main.less file in it. Here’s content of the file:
@import '../../bower_components/bootstrap/less/bootstrap';
Our build tasks will take this import directive and create us a nice main.css file that we can then use in our app.
npm install grunt-contrib-less --save-dev
And now let’s create a task to generate our css files by adding to our Gruntfile:
module.exports = function (grunt) {
grunt.initConfig({
express: {
test: {
options: {
script: './server.js'
}
}
},
cucumberjs: {
src: 'tests/e2e/features/',
options: {
steps: 'tests/e2e/steps/'
}
},
less: {
production: {
options: {
paths: ['app/css/'],
cleancss: true
},
files: {
'app/css/main.css': 'src/less/main.less'
}
}
}
});
grunt.loadNpmTasks('grunt-express-server');
grunt.loadNpmTasks('grunt-selenium-webdriver');
grunt.loadNpmTasks('grunt-cucumber');
grunt.loadNpmTasks('grunt-contrib-less');
grunt.registerTask('generate', ['less:production']);
grunt.registerTask('e2e', [
'selenium_start',
'express:test',
'cucumberjs',
'selenium_stop',
'express:test:stop'
]);
};
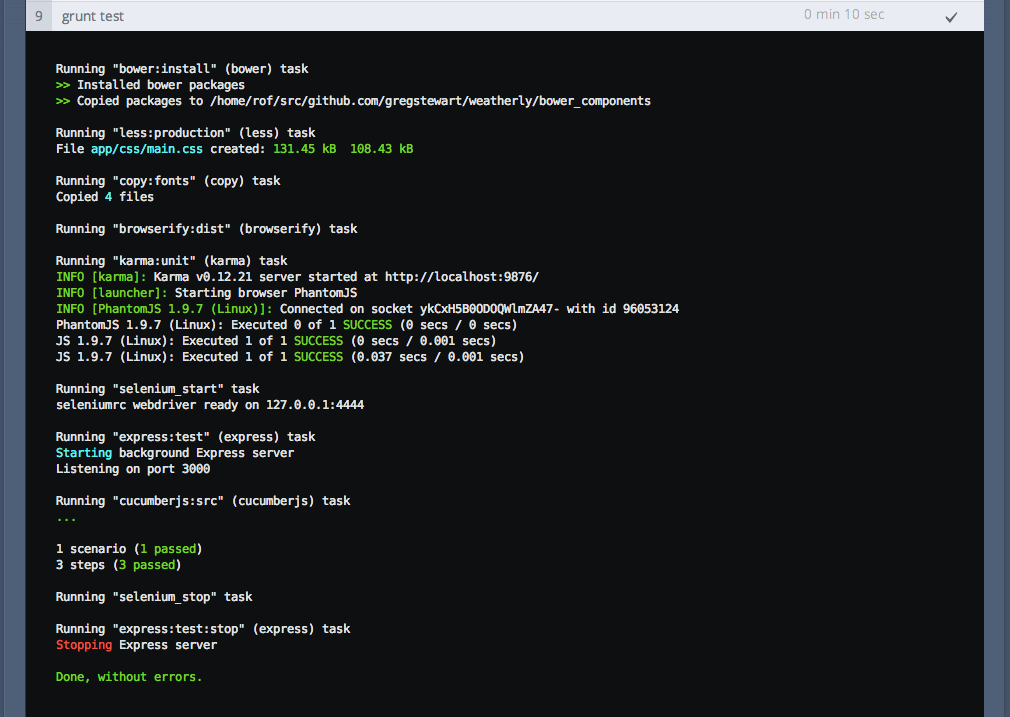
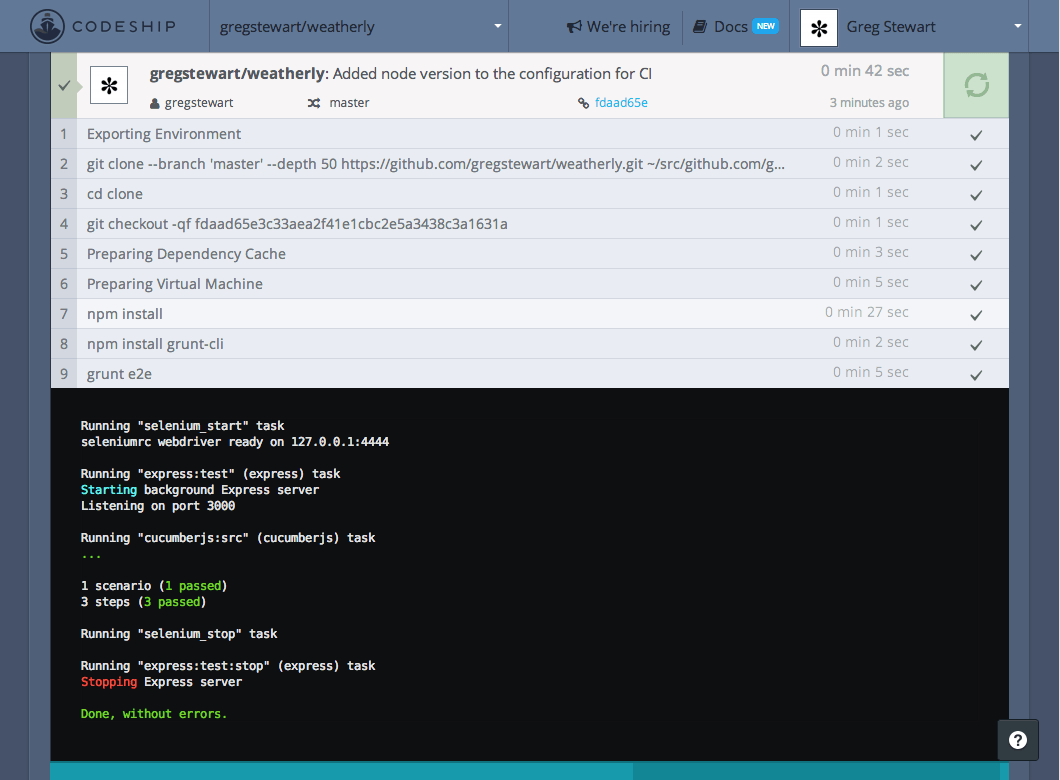
When you run grunt generate, you should see the following output:
Running "less:production" (less) task
File app/css/main.css created: 131.45 kB → 108.43 kB
If you were to start up our server and browse to localhost:3000, our UI should have more of a Bootstrap feel to it!
 Now bootstrap also needs some fonts, so let’s move these across as part of the build.
npm install grunt-contrib-copy --save-dev
And add a simple task to copy our fonts across as well:
module.exports = function (grunt) {
grunt.initConfig({
express: {
test: {
options: {
script: './server.js'
}
}
},
cucumberjs: {
src: 'tests/e2e/features/',
options: {
steps: 'tests/e2e/steps/'
}
},
less: {
production: {
options: {
paths: ['app/css/'],
cleancss: true
},
files: {
'app/css/main.css': 'src/less/main.less'
}
}
},
copy: {
fonts: {
expand: true,
src: ['bower_components/bootstrap-sass-official/vendor/assets/fonts/bootstrap/*'],
dest: 'app/css/bootstrap/',
filter: 'isFile',
flatten: true
}
}
});
grunt.loadNpmTasks('grunt-express-server');
grunt.loadNpmTasks('grunt-selenium-webdriver');
grunt.loadNpmTasks('grunt-cucumber');
grunt.loadNpmTasks('grunt-contrib-less');
grunt.loadNpmTasks('grunt-contrib-copy');
grunt.registerTask('generate', ['less:production', 'copy:fonts']);
grunt.registerTask('e2e', [
'selenium_start',
'express:test',
'cucumberjs',
'selenium_stop',
'express:test:stop'
]);
};
Running grunt generate task should now also copy our fonts across.
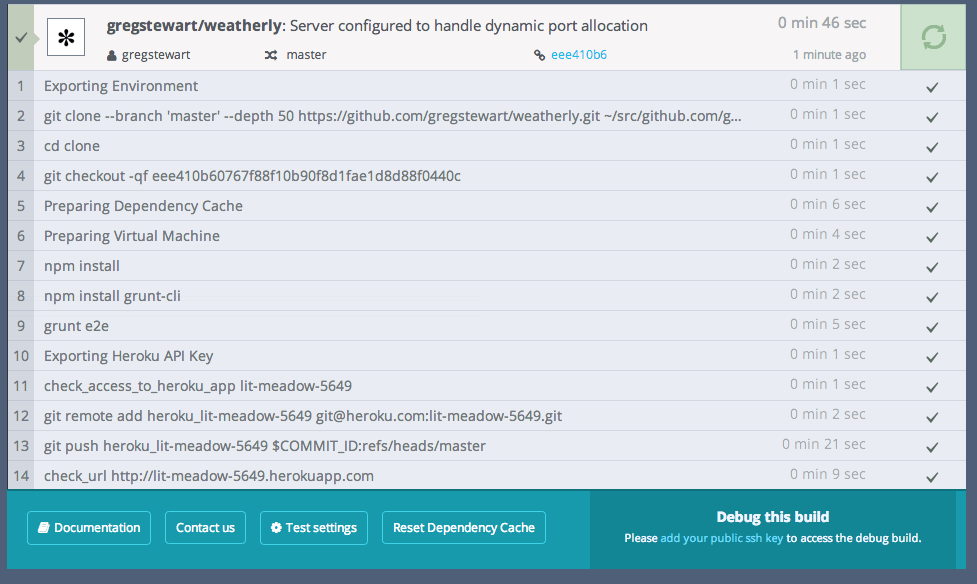
This is great, but how do we get this to run as part of our successful build?
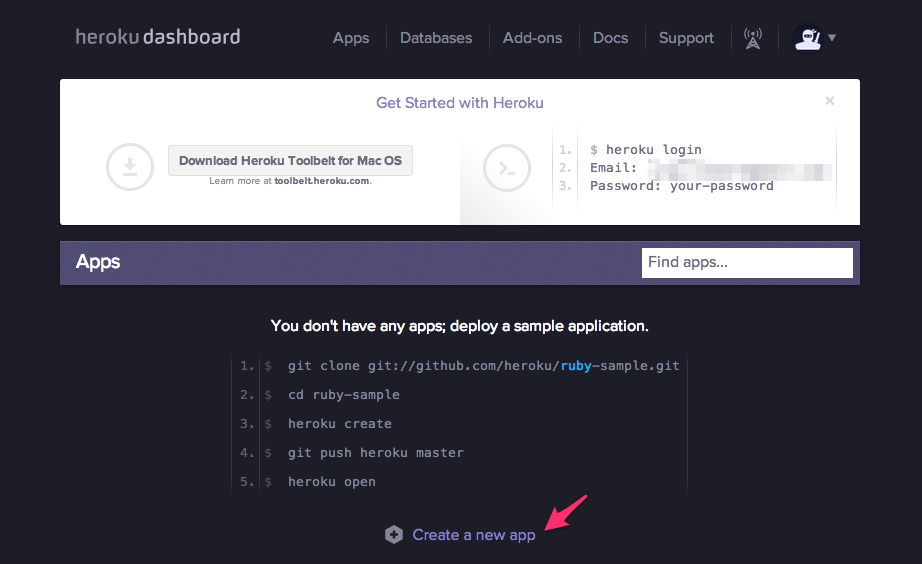
Heroku build packs
Heroku has a way to run commands after a build, these come in the form of build packs. Luckily for us someone has already gone through the effort of creating one to run Grunt after an install.
I have to say it’s not ideal, however given Heroku’s git based deployment approach, we have little choice but to generate these as part of the deployement. Typicall you would rely on the build to generate a package with all of the generated assets ready for consumption. This works though and does not force us to commit our generated assets into our repository.
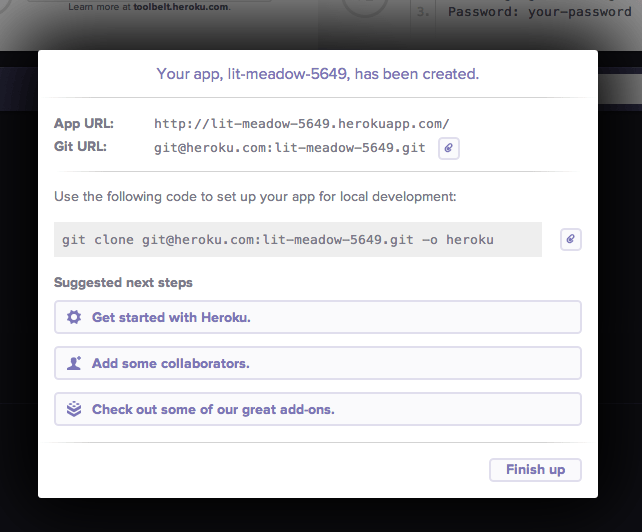
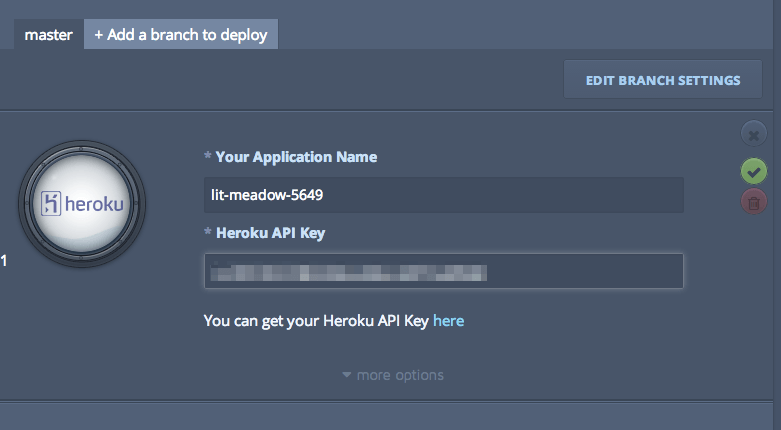
So here’s how you go about installing our Build Pack for Grunt (be sure to replace --app lit-meadow-5649 with your actual heroku app name):
heroku login
heroku config:add BUILDPACK_URL=https://github.com/mbuchetics/heroku-buildpack-nodejs-grunt.git --app lit-meadow-5649
heroku config:set NODE_ENV=production --app lit-meadow-5649
Then we modify our Gruntfile to include a new heroku:production task, which basically references our build task:
module.exports = function (grunt) {
grunt.initConfig({
express: {
test: {
options: {
script: './server.js'
}
}
},
cucumberjs: {
src: 'tests/e2e/features/',
options: {
steps: 'tests/e2e/steps/'
}
},
less: {
production: {
options: {
paths: ['app/css/'],
cleancss: true
},
files: {
'app/css/main.css': 'src/less/main.less'
}
}
},
copy: {
fonts: {
expand: true,
src: ['bower_components/bootstrap-sass-official/vendor/assets/fonts/bootstrap/*'],
dest: 'app/css/bootstrap/',
filter: 'isFile',
flatten: true
}
}
});
grunt.loadNpmTasks('grunt-express-server');
grunt.loadNpmTasks('grunt-selenium-webdriver');
grunt.loadNpmTasks('grunt-cucumber');
grunt.loadNpmTasks('grunt-contrib-less');
grunt.loadNpmTasks('grunt-contrib-copy');
grunt.registerTask('generate', ['less:production', 'copy:fonts']);
grunt.registerTask('e2e', [
'selenium_start',
'express:test',
'cucumberjs',
'selenium_stop',
'express:test:stop'
]);
grunt.registerTask('unit', [
'karma:unit'
]);
grunt.registerTask('heroku:production', 'generate');
};
The final step involves re-jigging package.json to include those newly added grunt tasks as a general dependency:
{
"name": "weatherly",
"version": "0.0.0",
"description": "Building a web app guided by tests",
"main": "index.js",
"engines": {
"node": "~0.10.28"
},
"scripts": {
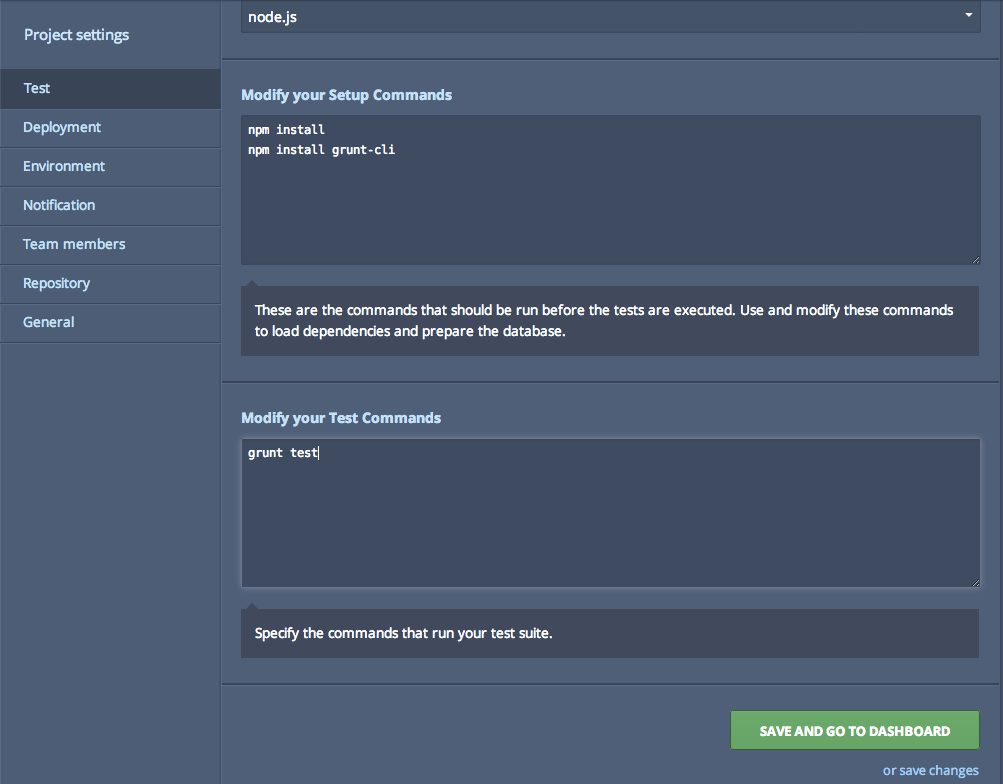
"test": "grunt test"
},
"repository": {
"type": "git",
"url": "https://github.com/gregstewart/weatherly.git"
},
"author": "Greg Stewart",
"license": "MIT",
"bugs": {
"url": "https://github.com/gregstewart/weatherly/issues"
},
"homepage": "https://github.com/gregstewart/weatherly",
"dependencies": {
"express": "^4.4.5",
"grunt-contrib-copy": "^0.5.0",
"grunt-contrib-less": "^0.11.3"
},
"devDependencies": {
"chai": "^1.9.1",
"cucumber": "^0.4.0",
"grunt": "^0.4.5",
"grunt-contrib-copy": "^0.5.0",
"grunt-contrib-less": "^0.11.3",
"grunt-cucumber": "^0.2.3",
"grunt-express-server": "^0.4.17",
"grunt-selenium-webdriver": "^0.2.420",
"webdriverjs": "^1.7.1"
}
}
This is another thing about this approach that I am not a fan of, having to move what are essentially development dependencies into our production dependencies.
Now we are nearly ready to test this out, however there is one more task we need to add. Since we are using Bower for some of our front end components and we haven’t checked these into our repository, we’ll need to restore them from our bower.json file. Let’s first install a new grunt package to assist us:
npm install grunt-bower-task --save
And the edit our Gruntfile.js:
module.exports = function (grunt) {
grunt.initConfig({
express: {
test: {
options: {
script: './server.js'
}
}
},
cucumberjs: {
src: 'tests/e2e/features/',
options: {
steps: 'tests/e2e/steps/'
}
},
less: {
production: {
options: {
paths: ['app/css/'],
cleancss: true
},
files: {
'app/css/main.css': 'src/less/main.less'
}
}
},
copy: {
fonts: {
expand: true,
src: ['bower_components/bootstrap-sass-official/vendor/assets/fonts/bootstrap/*'],
dest: 'app/css/bootstrap/',
filter: 'isFile',
flatten: true
}
},
bower: {
install: {
options: {
cleanTargetDir:false,
targetDir: './bower_components'
}
}
}
});
grunt.loadNpmTasks('grunt-express-server');
grunt.loadNpmTasks('grunt-selenium-webdriver');
grunt.loadNpmTasks('grunt-cucumber');
grunt.loadNpmTasks('grunt-contrib-less');
grunt.loadNpmTasks('grunt-contrib-copy');
grunt.loadNpmTasks('grunt-bower-task');
grunt.registerTask('generate', ['less:production', 'copy:fonts']);
grunt.registerTask('build', ['bower:install', 'generate']);
grunt.registerTask('e2e', [
'selenium_start',
'express:test',
'cucumberjs',
'selenium_stop',
'express:test:stop'
]);
grunt.registerTask('heroku:production', 'build');
};
With that let’s push these changes and see if we can’t have a more nicely styled page appear on our Heroku app!
git add .
git commit -m "Generate less as part of the build and copy fonts to app folder"
git checkout master
git merge code-build
git push origin master
Concatenate and minify our JavaScript
Having generated our CSS at build time, it’s time to turn our attention to concatenating and minifying our JavaScript.
If you recall in our getting started section we set up our project and used Bower to manage our front end dependencies. For our code we will be Browserify and adopting a CommonJS approach to dealing with modules and dependencies.
To get started let’s first create a our source directory for our JavaScript, we’ll store our source under src/js and let’s create a file to test our build process called TodaysWeather.js and let’s save it under a sub folder called models:
var TodaysWeather = function () {
console.log('test');
};
module.exports = TodaysWeather;
With that done let’s install a grunt task for Browserify
npm install grunt-browserify --save
The reason we have chosen a grunt task is that we will use this to export our source so that browsers can understand module.exports and use it to concatenate our code.
We’ll skip through a few steps below and edit our Gruntfile.js to include the task we just installed, define the steps to build our JavaScript and include it into our build task:
module.exports = function (grunt) {
grunt.initConfig({
express: {
test: {
options: {
script: './server.js'
}
}
},
cucumberjs: {
src: 'tests/e2e/features/',
options: {
steps: 'tests/e2e/steps/'
}
},
less: {
production: {
options: {
paths: ['app/css/'],
cleancss: true
},
files: {
'app/css/main.css': 'src/less/main.less'
}
}
},
copy: {
fonts: {
expand: true,
src: ['bower_components/bootstrap-sass-official/vendor/assets/fonts/bootstrap/*'],
dest: 'app/css/bootstrap/',
filter: 'isFile',
flatten: true
}
},
bower: {
install: {
options: {
cleanTargetDir:false,
targetDir: './bower_components'
}
}
},
browserify: {
dist: {
files: {
'app/js/main.min.js': ['src/js/**/*.js']
}
}
}
});
grunt.loadNpmTasks('grunt-express-server');
grunt.loadNpmTasks('grunt-selenium-webdriver');
grunt.loadNpmTasks('grunt-cucumber');
grunt.loadNpmTasks('grunt-contrib-less');
grunt.loadNpmTasks('grunt-contrib-copy');
grunt.loadNpmTasks('grunt-bower-task');
grunt.loadNpmTasks('grunt-browserify');
grunt.registerTask('generate', ['less:production', 'copy:fonts', 'browserify']);
grunt.registerTask('build', ['bower:install', 'generate']);
grunt.registerTask('e2e', [
'selenium_start',
'express:test',
'cucumberjs',
'selenium_stop',
'express:test:stop'
]);
grunt.registerTask('heroku:production', 'build');
};
If we now run our generate task you should find a main.min.js file under app/js, which contains a bunch of Browserify and our test file. However you will notice that while it’s concatenated it’s not minified. Let’s fix this.
I chose to go with Uglifyify, as always let’s just install it:
npm install uglifyify --save
And then edit our Gruntfile.js by configuring our browserify task to use it is a transform:
module.exports = function (grunt) {
grunt.initConfig({
express: {
test: {
options: {
script: './server.js'
}
}
},
cucumberjs: {
src: 'tests/e2e/features/',
options: {
steps: 'tests/e2e/steps/'
}
},
less: {
production: {
options: {
paths: ['app/css/'],
cleancss: true
},
files: {
'app/css/main.css': 'src/less/main.less'
}
}
},
copy: {
fonts: {
expand: true,
src: ['bower_components/bootstrap-sass-official/vendor/assets/fonts/bootstrap/*'],
dest: 'app/css/bootstrap/',
filter: 'isFile',
flatten: true
}
},
bower: {
install: {
options: {
cleanTargetDir:false,
targetDir: './bower_components'
}
}
},
browserify: {
dist: {
files: {
'app/js/main.min.js': ['src/js/**/*.js']
}
},
options: {
transform: ['uglifyify']
}
}
});
grunt.loadNpmTasks('grunt-express-server');
grunt.loadNpmTasks('grunt-selenium-webdriver');
grunt.loadNpmTasks('grunt-cucumber');
grunt.loadNpmTasks('grunt-contrib-less');
grunt.loadNpmTasks('grunt-contrib-copy');
grunt.loadNpmTasks('grunt-bower-task');
grunt.loadNpmTasks('grunt-browserify');
grunt.registerTask('generate', ['less:production', 'copy:fonts', 'browserify']);
grunt.registerTask('build', ['bower:install', 'generate']);
grunt.registerTask('e2e', [
'selenium_start',
'express:test',
'cucumberjs',
'selenium_stop',
'express:test:stop'
]);
grunt.registerTask('heroku:production', 'build');
};
If you now run our generate task, the contents of main should be nicely minified. Now all that’s left to do is edit our index.html file and add our generated JavaScript file:
<!DOCTYPE html>
<!--[if lt IE 7]> <html class="no-js lt-ie9 lt-ie8 lt-ie7"> <![endif]-->
<!--[if IE 7]> <html class="no-js lt-ie9 lt-ie8"> <![endif]-->
<!--[if IE 8]> <html class="no-js lt-ie9"> <![endif]-->
<!--[if gt IE 8]><!--> <html class="no-js"> <!--<![endif]-->
<head>
<meta charset="utf-8">
<meta http-equiv="X-UA-Compatible" content="IE=edge">
<title>Weatherly - Forecast for London</title>
<meta name="description" content="">
<meta name="viewport" content="width=device-width, initial-scale=1">
<!-- Place favicon.ico and apple-touch-icon.png in the root directory -->
<link rel="stylesheet" href="css/main.css">
</head>
<body>
<!--[if lt IE 7]>
<p class="browsehappy">You are using an <strong>outdated</strong> browser. Please <a href="http://browsehappy.com/">upgrade your browser</a> to improve your experience.</p>
<![endif]-->
<!-- Add your site or application content here -->
<div class="container">
<div class="header">
<ul class="nav nav-pills pull-right">
<li class="active"><a href="#">Home</a></li>
<li><a href="#">About</a></li>
<li><a href="#">Contact</a></li>
</ul>
</div>
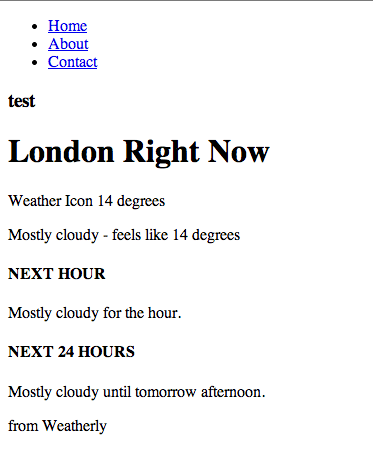
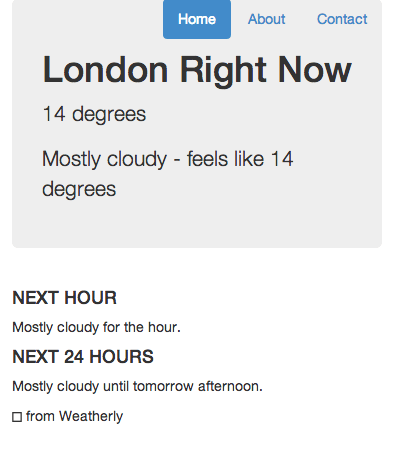
<div class="jumbotron">
<h1>London Right Now</h1>
<p class="temperature">14 degrees</p>
<p>Mostly cloudy - feels like 14 degrees</p>
</div>
<div class="row marketing">
<div class="col-lg-6">
<h4>NEXT HOUR</h4>
<p>Mostly cloudy for the hour.</p>
<h4>NEXT 24 HOURS</h4>
<p>Mostly cloudy until tomorrow afternoon.</p>
</div>
</div>
<div class="footer">
<p><span class="glyphicon glyphicon-heart"></span> from Weatherly</p>
</div>
</div>
<p></p>
<script src="//ajax.googleapis.com/ajax/libs/jquery/1.10.2/jquery.min.js"></script>
<script>window.jQuery || document.write('<script src="js/vendor/jquery-1.10.2.min.js"><\/script>')</script>
<!-- Google Analytics: change UA-XXXXX-X to be your site's ID. -->
<script>
(function(b,o,i,l,e,r){b.GoogleAnalyticsObject=l;b[l]||(b[l]=
function(){(b[l].q=b[l].q||[]).push(arguments)});b[l].l=+new Date;
e=o.createElement(i);r=o.getElementsByTagName(i)[0];
e.src='//www.google-analytics.com/analytics.js';
r.parentNode.insertBefore(e,r)}(window,document,'script','ga'));
ga('create','UA-XXXXX-X');ga('send','pageview');
</script>
<script src="js/main.min.js"></script>
</body>
</html>
Before we commit our changes let’s edit our .gitignore file one more time and tell it not to include our generated JavaScript:
node_modules
.idea
bower_components
phantomjsdriver.log
app/css/
app/fonts/
app/js/
Let’s commit, merge and push to our remote repository:
git add .
git commit -m "JavaScript browserified and uglyfied"
git checkout master
git merge generate-assets
git push
You can read the full book over at GitBook or
LeanPub. Updated content for this chapter can be found on
GitHub.